
Have you been using GitHub Pages to host your website or blog, but want to use a custom domain name? By following a few simple steps, you can connect your GitHub Pages site with a custom domain and create a more professional-looking URL for your website. Here's how to do it:
1. Purchase a domain: You'll need to purchase a custom domain name from a domain registrar of your choice. Popular options include GoDaddy, Namecheap, and Google Domains.
2. Create a CNAME file: Open your repository in GitHub and create a new file named "CNAME". In this file, add your custom domain name, for example, "www.mysite.com". Save the file. 3. Update DNS records: Log in to your domain registrar account and update your DNS records. Add a CNAME record for "www" to your GitHub Pages URL. The value of the CNAME record should be in the format of "username.github.io.", with the trailing dot included. This connects your custom domain to your GitHub Pages site. 4. Check your settings: Ensure that the settings in your repository match your live website domain name. Verify that your repository is set to use the custom domain in the "Custom domain" field under your repository settings in GitHub.
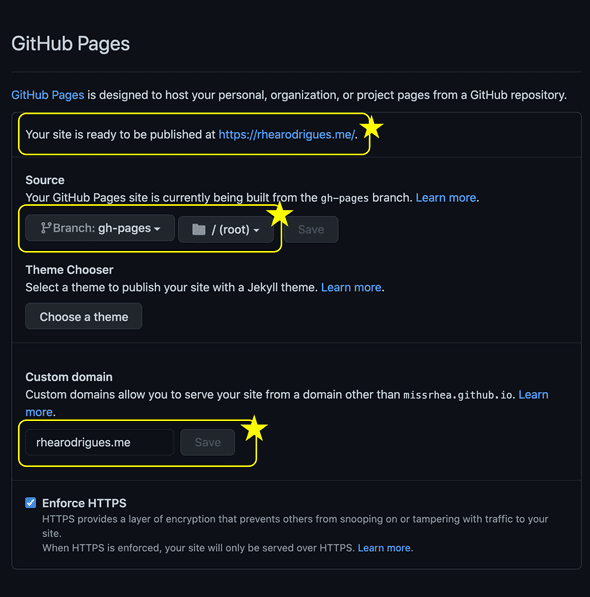
5. Wait for propagation: Once you've set up your CNAME file and updated your DNS records, it may take some time for the changes to propagate and your custom domain to become active. Wait for a few hours and then test your custom domain in a browser to ensure that it's working correctly. By following these easy steps, you can connect your GitHub Pages site with a custom domain and take your website to the next level. We hope this guide has been helpful!
Comments
Post a Comment